Getting Started
Appflow is the tool used to build and distribute your web bundles across your team and deploy Live Updates to your end users.
You can login to Appflow here, either using your email address or an org slug if one has been provided to you.
When going through this tutorial, it will be beneficial to keep in mind the structure of your organizaton and how the responsibilities will differ between teams. In an organization with web and native developers, the web developers will be responsible for setting up the apps in Appflow and performing web builds/deployments, while the native developers will be responsible for configuring the Live Updates SDK and using the Portals CLI to pull down the appropriate web bundles during build time.
Accessing the debug project
We will be using the portals-debug-app repository for the purpose of this tutorial, however Appflow will support any web app that can be compiled with npm or yarn.
Start by forking or cloning the portals-debug-app repository. If you choose to clone the repository, you should push a copy of it to the git provider of your choice (Appflow supports Github, Gitlab, Bitbucket, and Azure DevOps).
If you are using your own web app rather than the demo project, then you should add a capacitor.config.json file to the root of your web project. Capacitor is not technically needed as a web project dependency, but the configuration file will help provide some configuration options for Portals. The following configuration can be used:
{
  "appId": "io.ionic.starter",
  "appName": "Portals Debug Web App",
  "webDir": "dist"
}
Our demo project already contains a capacitor.config.ts file which gets compiled to a json file during the build process, so adding one to the debug project is not necessary.
Creating a new Appflow app
After the app has been made available in a git repository, you can create a new app in Appflow. Navigate to the Apps page in Appflow and select New app in the top right. From the drop down, select Import app.
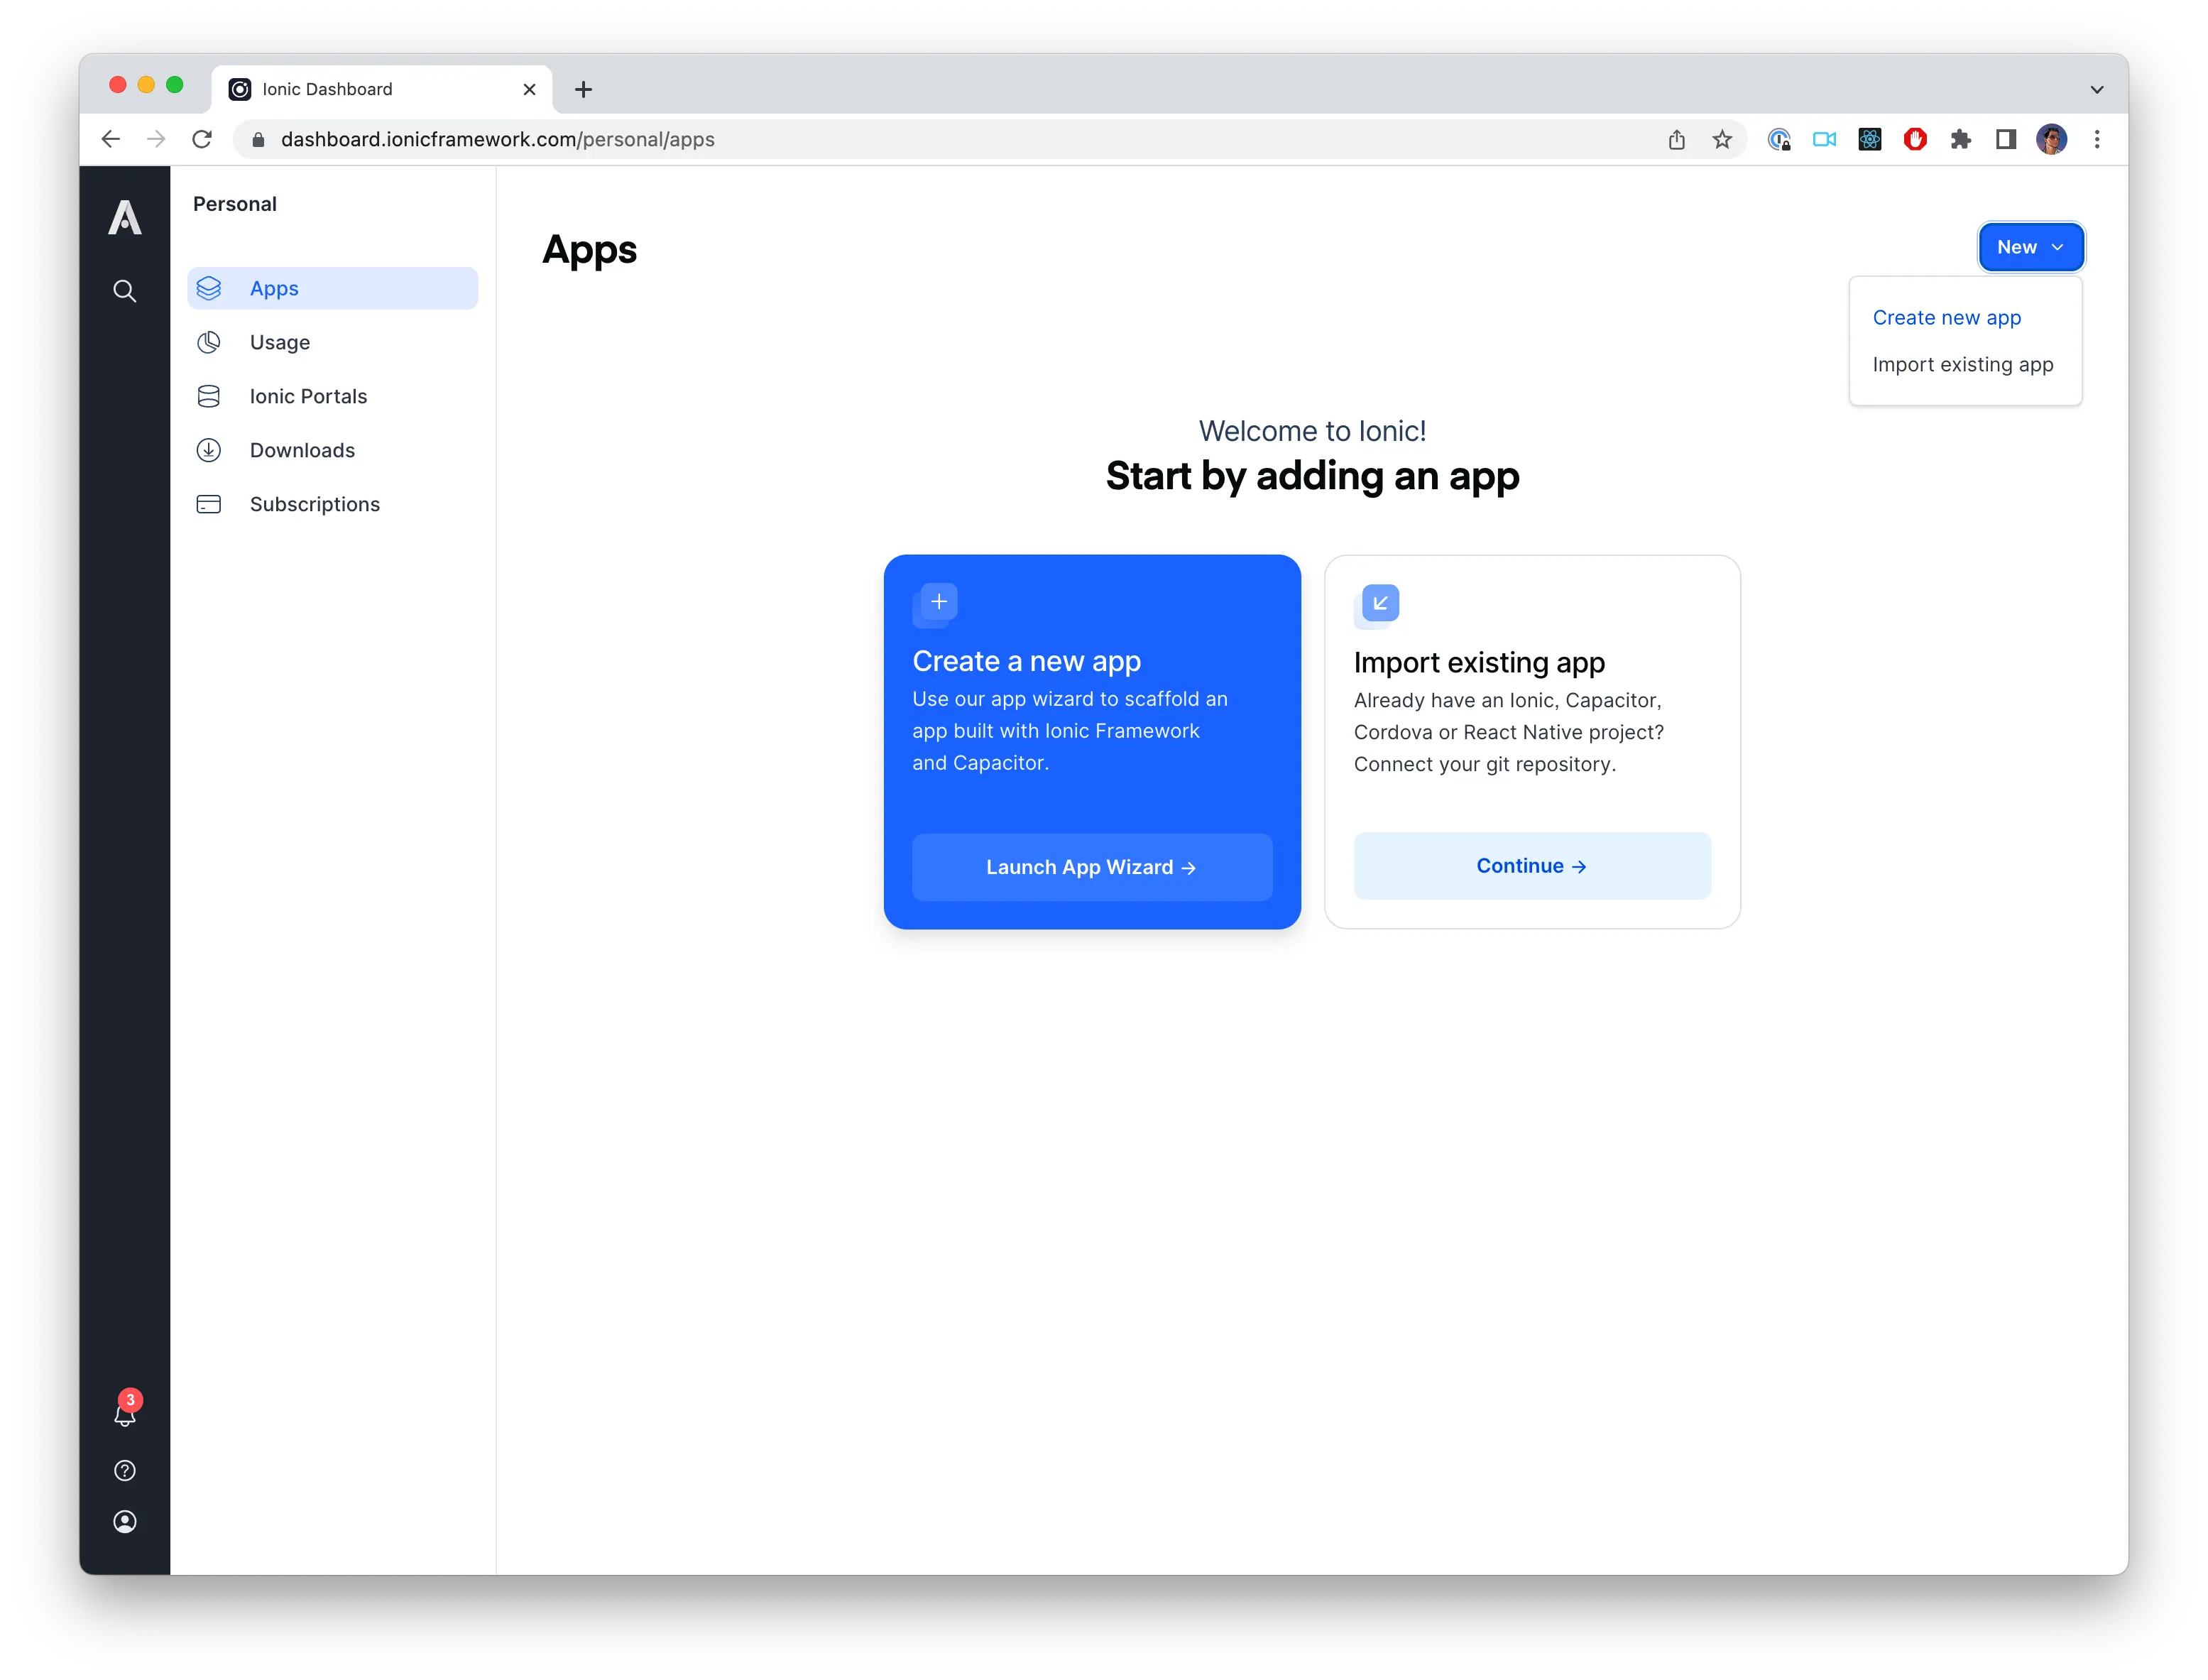
On the Import existing app screen, select Capacitor as the mobile architecture and link the appropriate repository. The app name you provide is only used to identify the app in Appflow, so you may use whichever name makes sense for you.

Performing a new build
After the app has been created, you can navigate to the Builds page to perform a build. Anytime you want to deploy a new version of the web application, you will need to create a build from this screen or by using the Appflow CLI (which will be covered later).
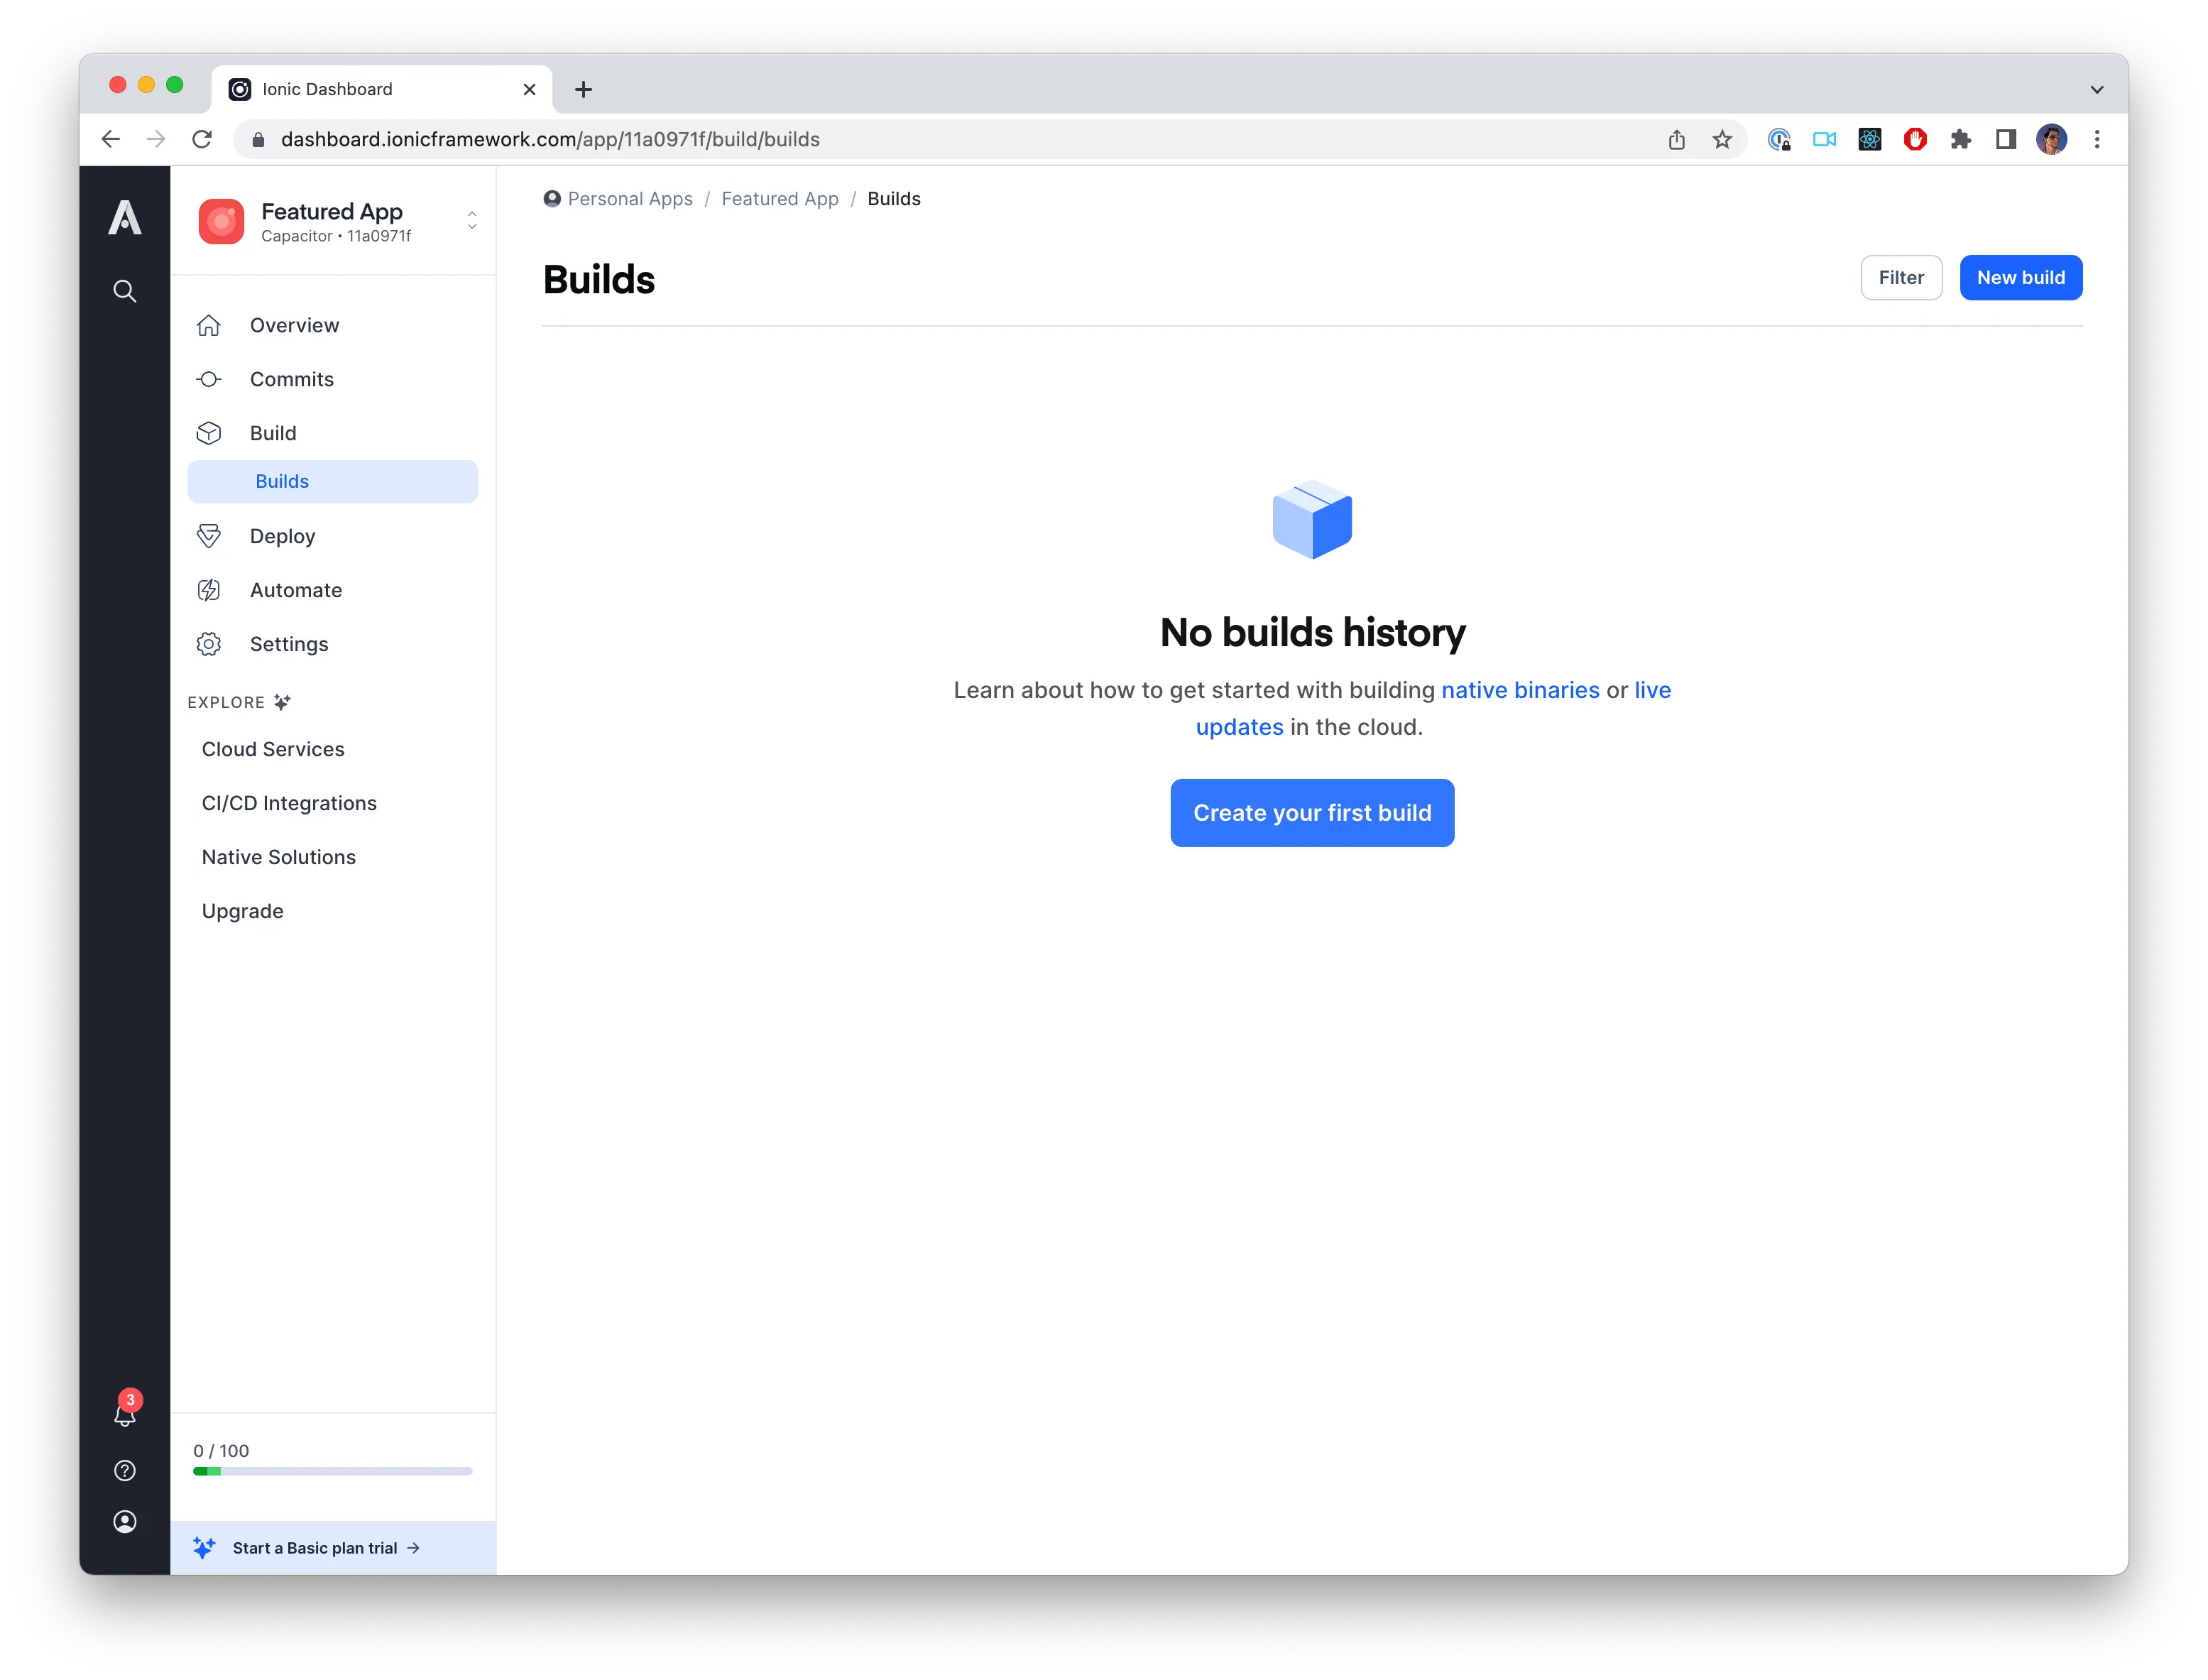
Also in the top left corner of these screens you will see the Appflow app ID. In this case it is 11a0971f. This id will be used when we configure the native application.
After the application has been added to Appflow you will need to create your first build so that it is available to seed the Portal in the Native App.
This can be done by clicking the New Build button on the Builds page. Then you will choose the appropriate commit to create the build from.
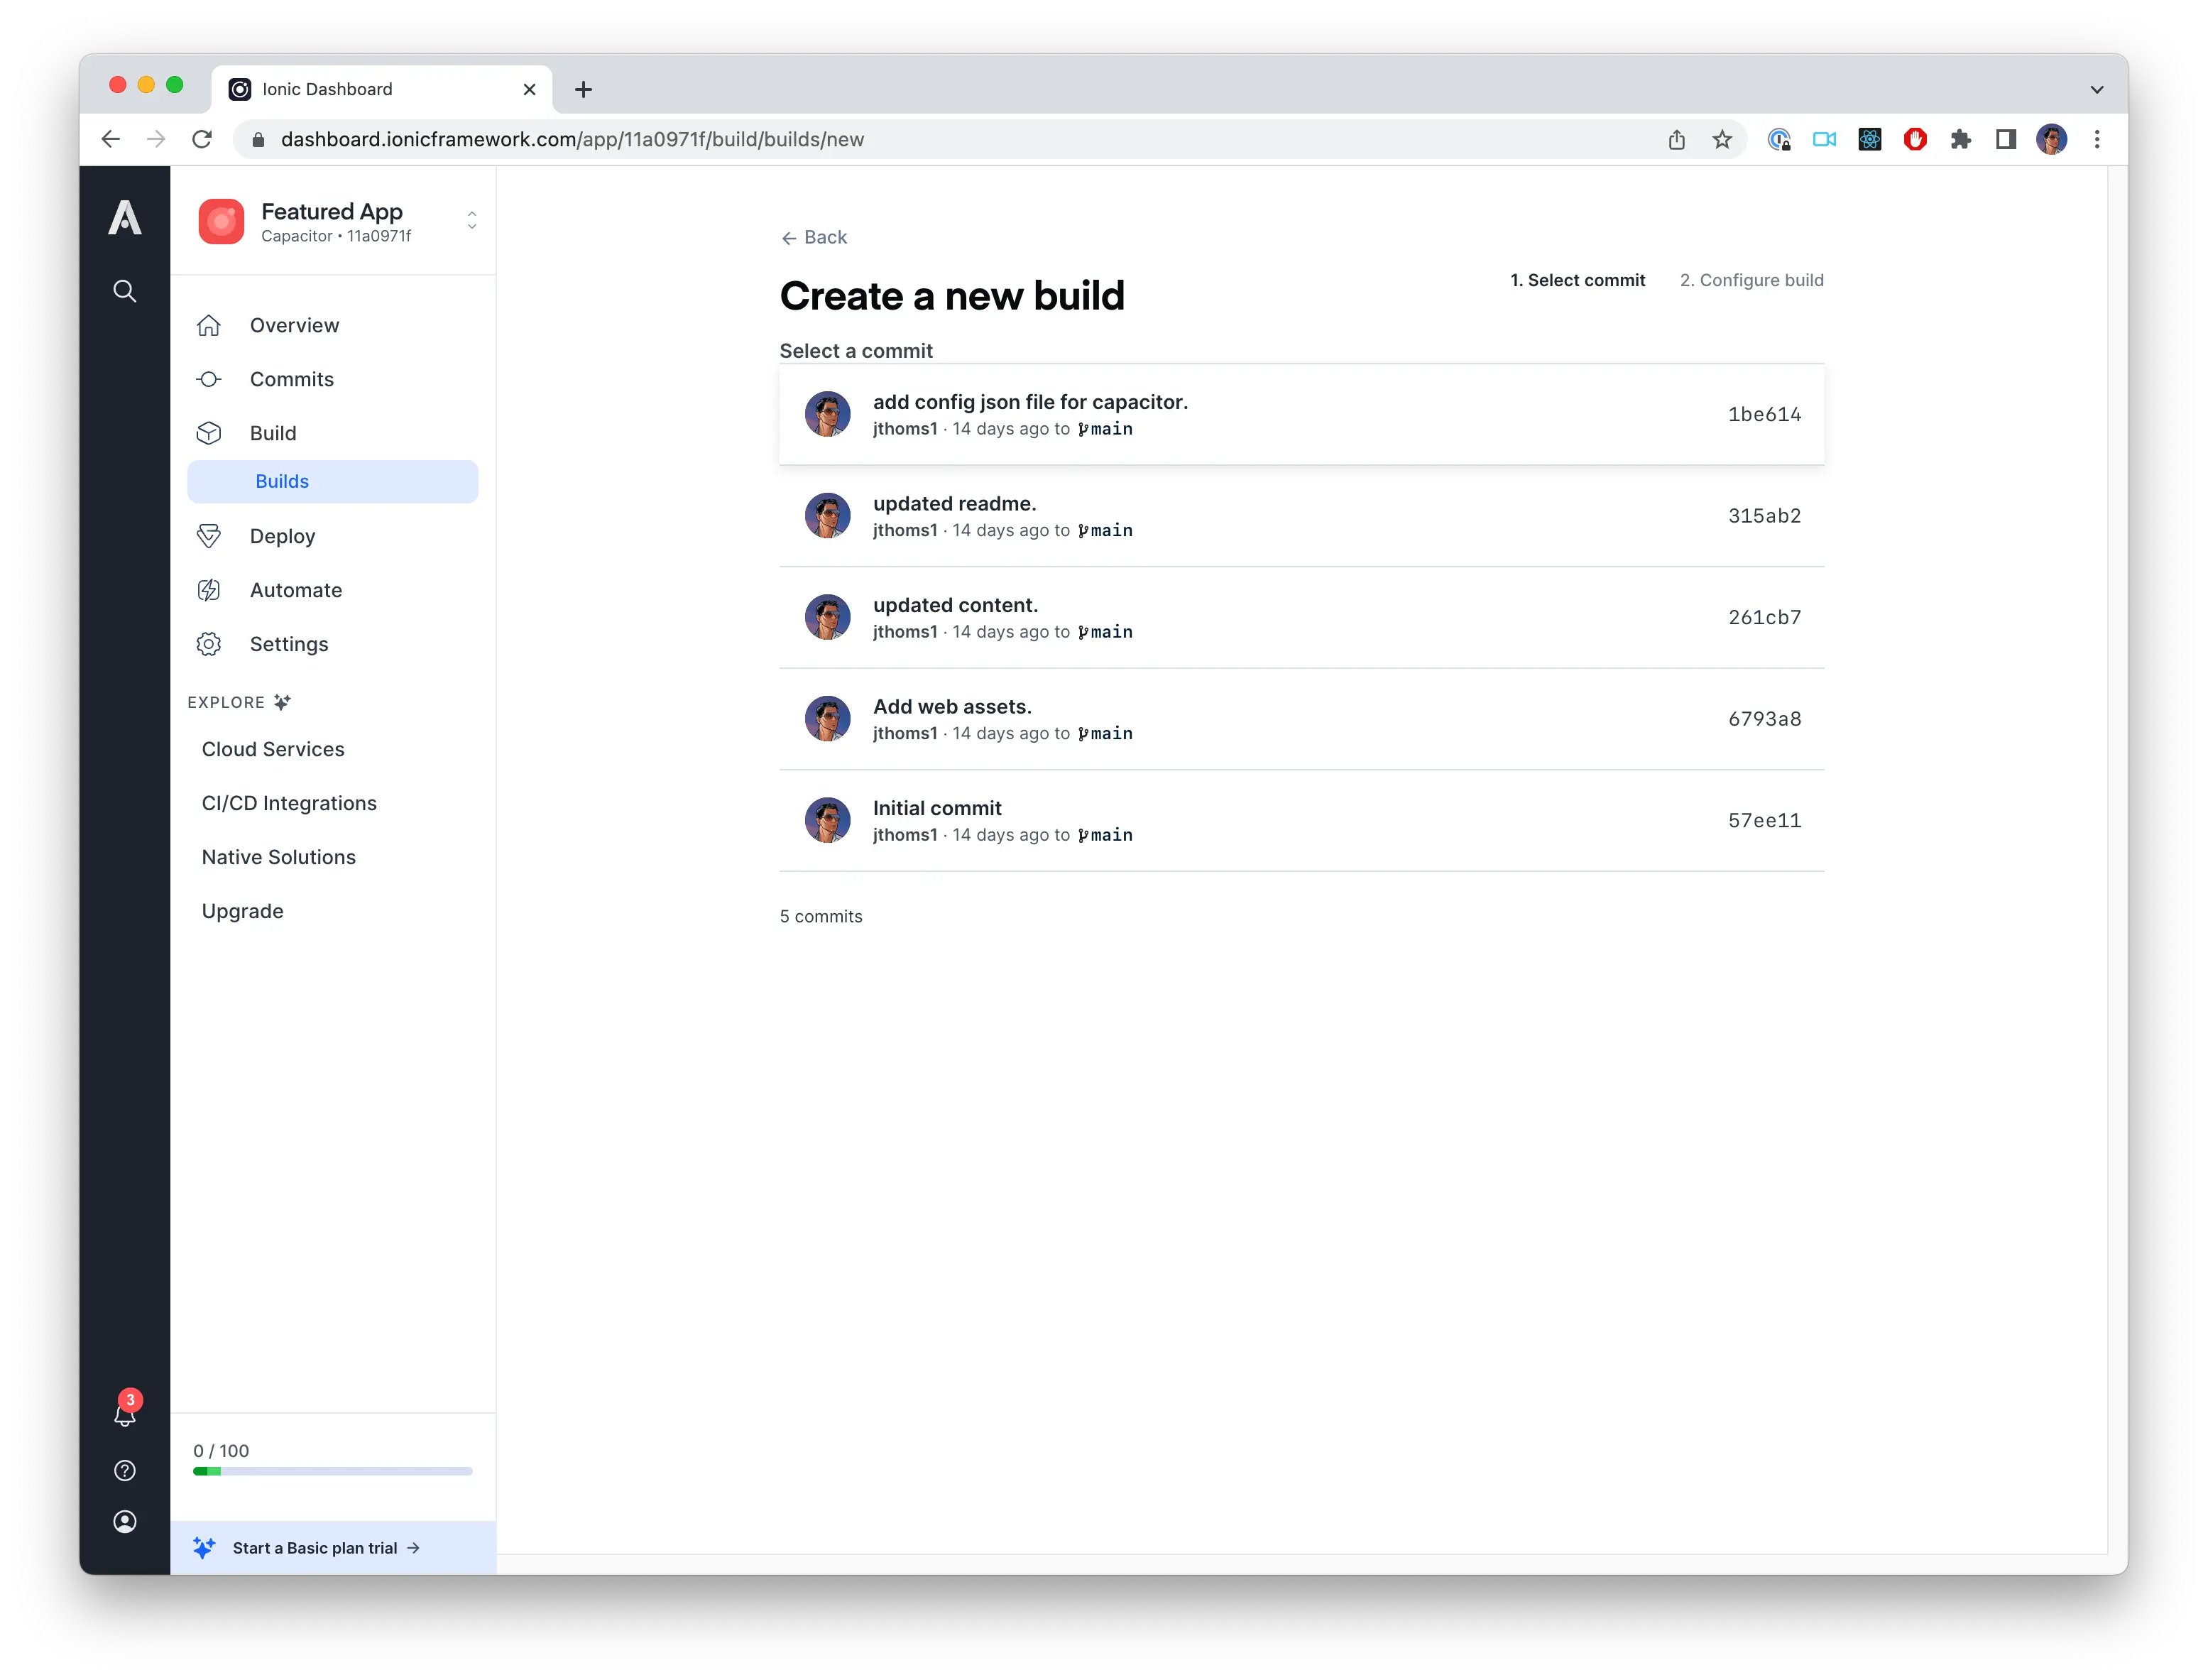

When creating a new build, Appflow will present a few configuration options.
- Target platform should be Web.
- Build stack should be the default latest build stack.
- Live update should be toggled on and the selected channel should be Production. This can also be configured after the build is complete.
Once you click Build, Appflow will spin up a new build runner that will install your project dependencies and build your web application. After the build is complete, it will deploy the build to our Production Live Update channel.
With the application build and deployed, native developers can:
- Use the Portals CLI to pull down the web bundle during development & the native build process.
- Add the Live Updates SDK into your app.
Automating web deployments
Everything that we did in the Appflow dashboard can also be done using the Appflow CLI. In the previous step, we created a new web build and deployed it to the Production Live Update channel. Rather than doing this manually in the dashboard, this can be automated as part of the build pipeline for your web app.
Begin by installing the Appflow CLI and creating a Personal Access Token. The Personal Access Token will be used to authenticate with Appflow.
With the Appflow CLI installed, we can trigger a new build using the build web command.
appflow build web --app-id=11a0971f --commit=1be614 --json
Once this build is complete, it will return a json object to standard output. The buildId can be extracted using a tool like jq.
To deploy this web build as a live update, we can use the deploy web command using the buildId captured in the previous step. We will provide the name of our Live Update channel as the destination.
appflow deploy web --app-id=11a0971f --build-id=9325841 --destination=Production
With these two steps complete, the new web build is available to be pulled down from the Production channel. To see the additional features of Appflow CLI, review our CLI documentation.
The older version of the Appflow CLI is called the Ionic Cloud CLI. If you are using the Ionic Cloud CLI, the above commands will work, but the executable will be called ionic-cloud rather than appflow.
Conclusion
In this tutorial, we built a demo web app in Appflow, deployed it to a Live Update channel, and reviewed how to programatically build and deploy Live Updates with the Appflow CLI. In the next section, we will review how to adapt your app to use Appflow and review some of the more commonly used Appflow features.